
QwenPaw Creator
English | 中文
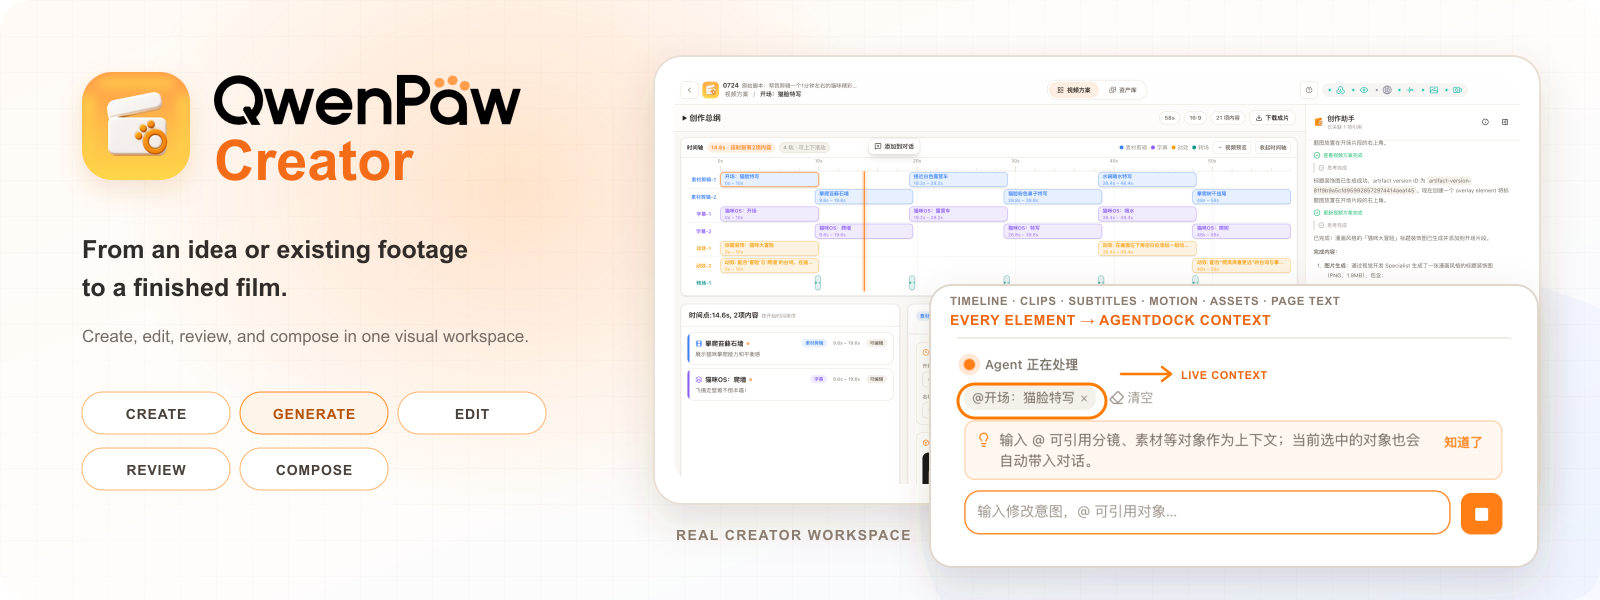
QwenPaw Creator is an agentic video creation platform: you set the goal, provide sources, and steer the direction; an Agent team handles planning, generation, editing, and composition, returning every important decision to you.
- The Agent stays throughout the process: screenwriting, directing, visual development, motion, and editing Specialists collaborate against live project state;
- You remain in control: redirect the work with a sentence or fine-tune an object directly on the timeline;
- Start either way: generate a short drama from an idea, or turn existing footage into a finished film.
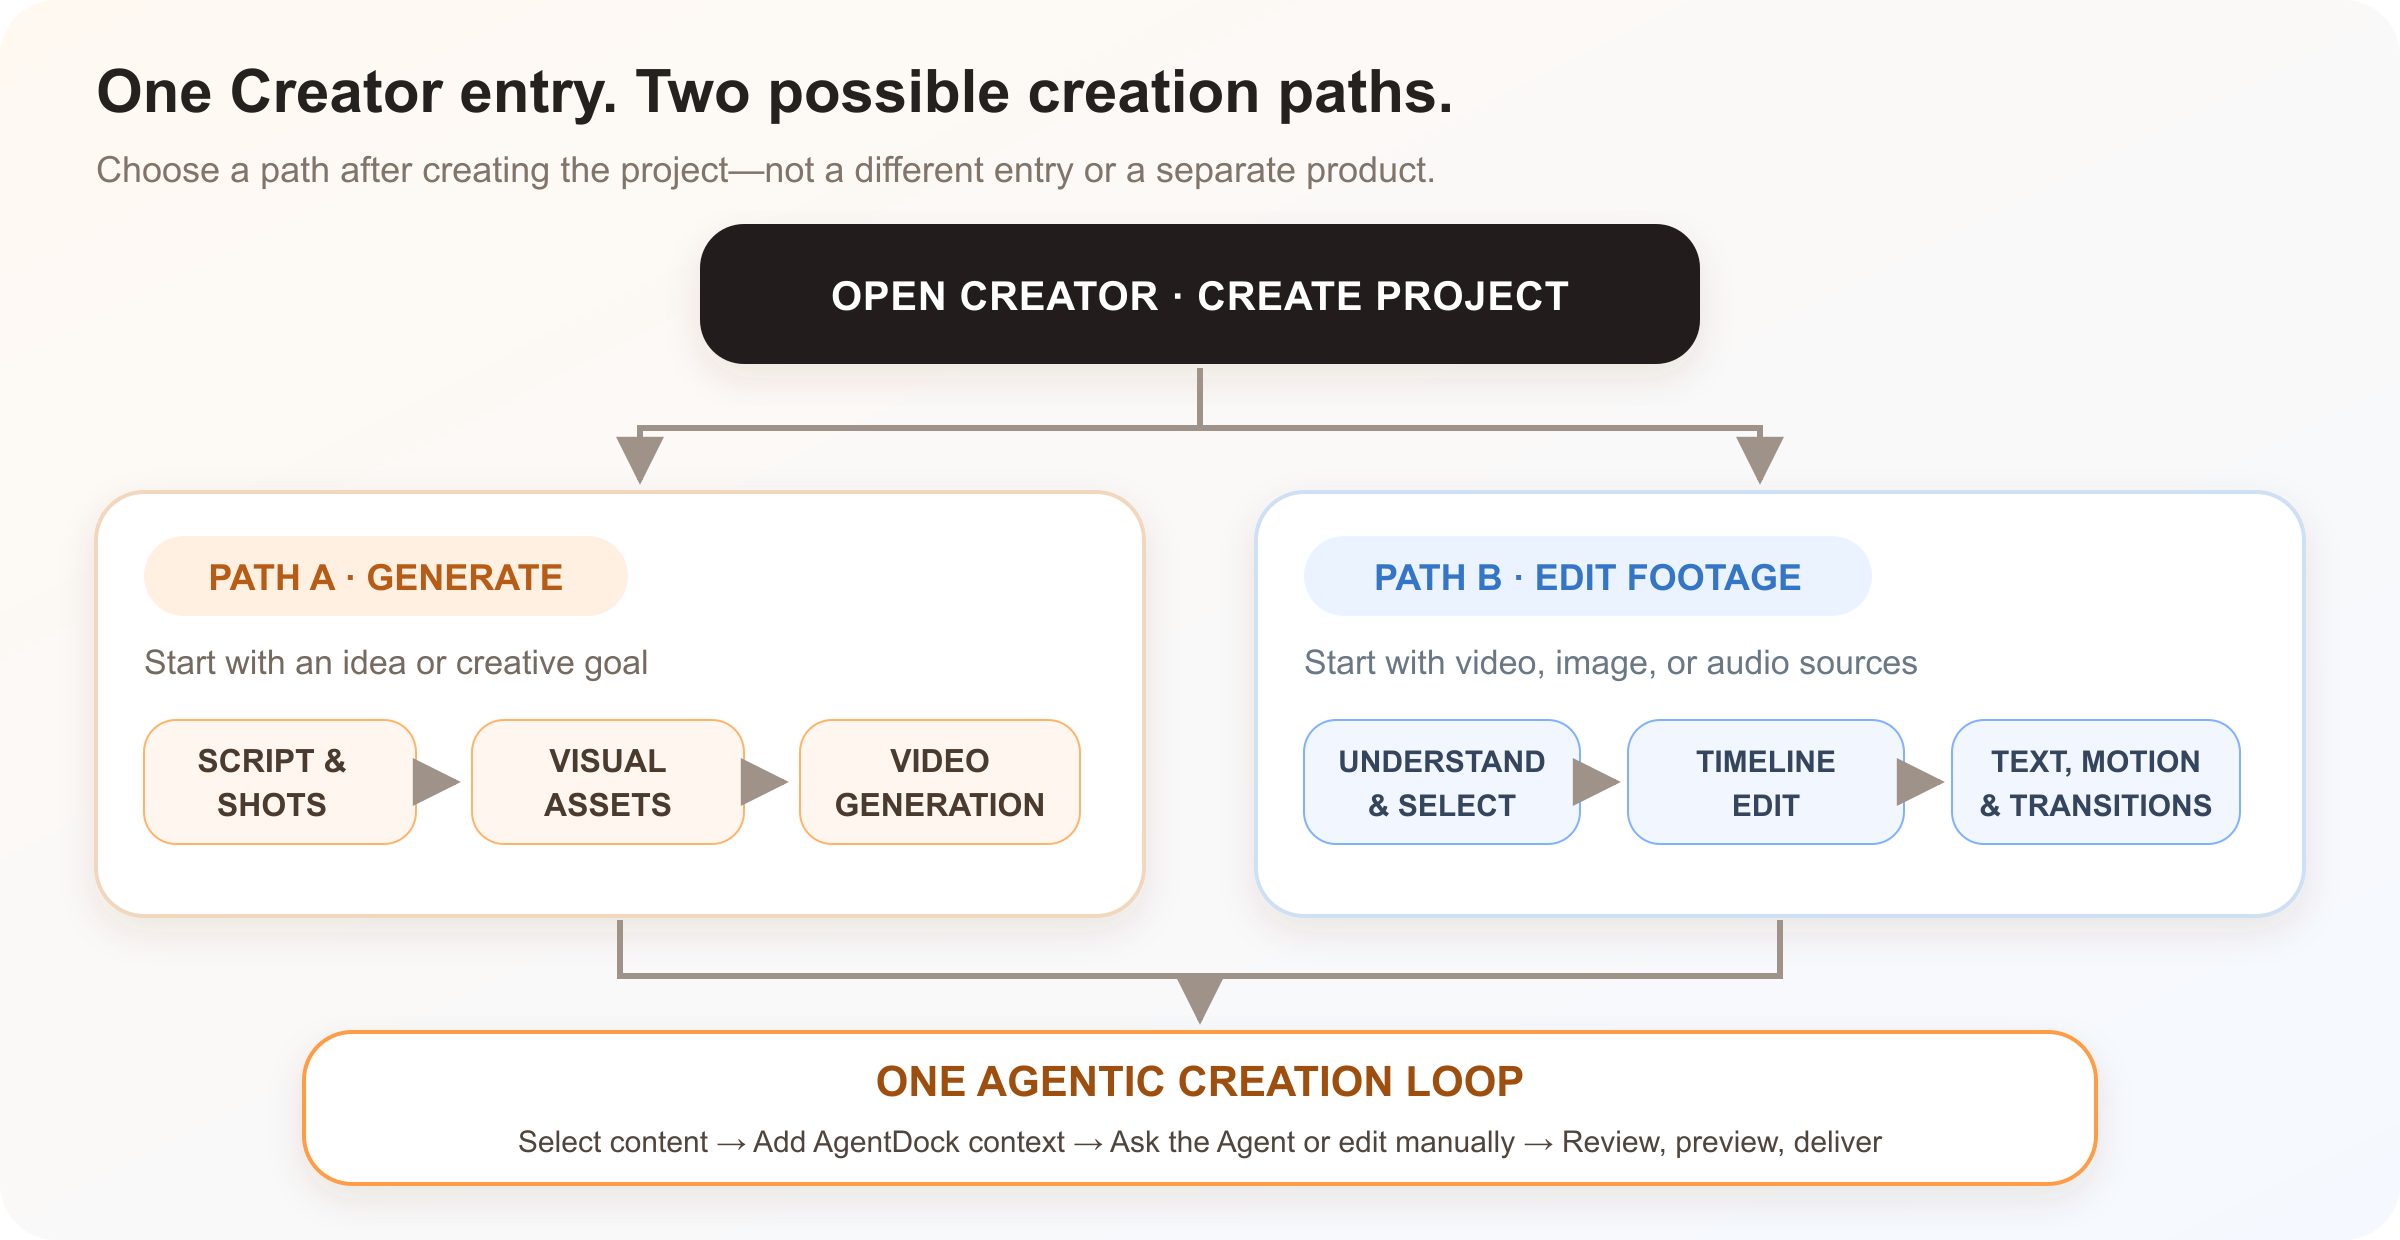
Start your first project in three minutes
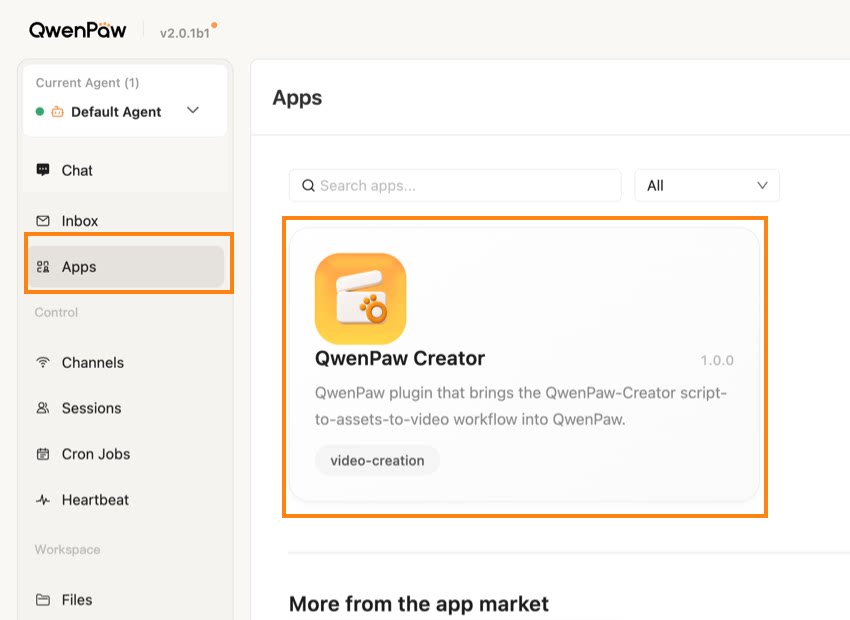
1. Open Creator
Creator is installed and opened from Apps in QwenPaw. Start QwenPaw and open the console (default http://127.0.0.1:8088/), select Apps in the left navigation, find QwenPaw Creator, and choose Install. After installation, open it from the same Apps page.
2. Configure models
Before your first project, open Model Configuration at the lower right of the home composer (or follow the first-run guide). Connect only the capabilities your scenario needs:
| How you create | Model capabilities you need |
|---|---|
| Every scenario | Large language model (LLM) |
| Generative work such as drama | Image generation, video generation, and vision-language (VLM) |
| Editing uploaded footage | VLM; add speech recognition (ASR) when the footage contains voice |
LLM / VLM connections include OpenAI-compatible APIs, Bailian, Claude, DeepSeek, Gemini, Qianfan, Volcano Engine, and custom providers. Available image, video, and ASR providers are grouped by capability in Model Configuration.
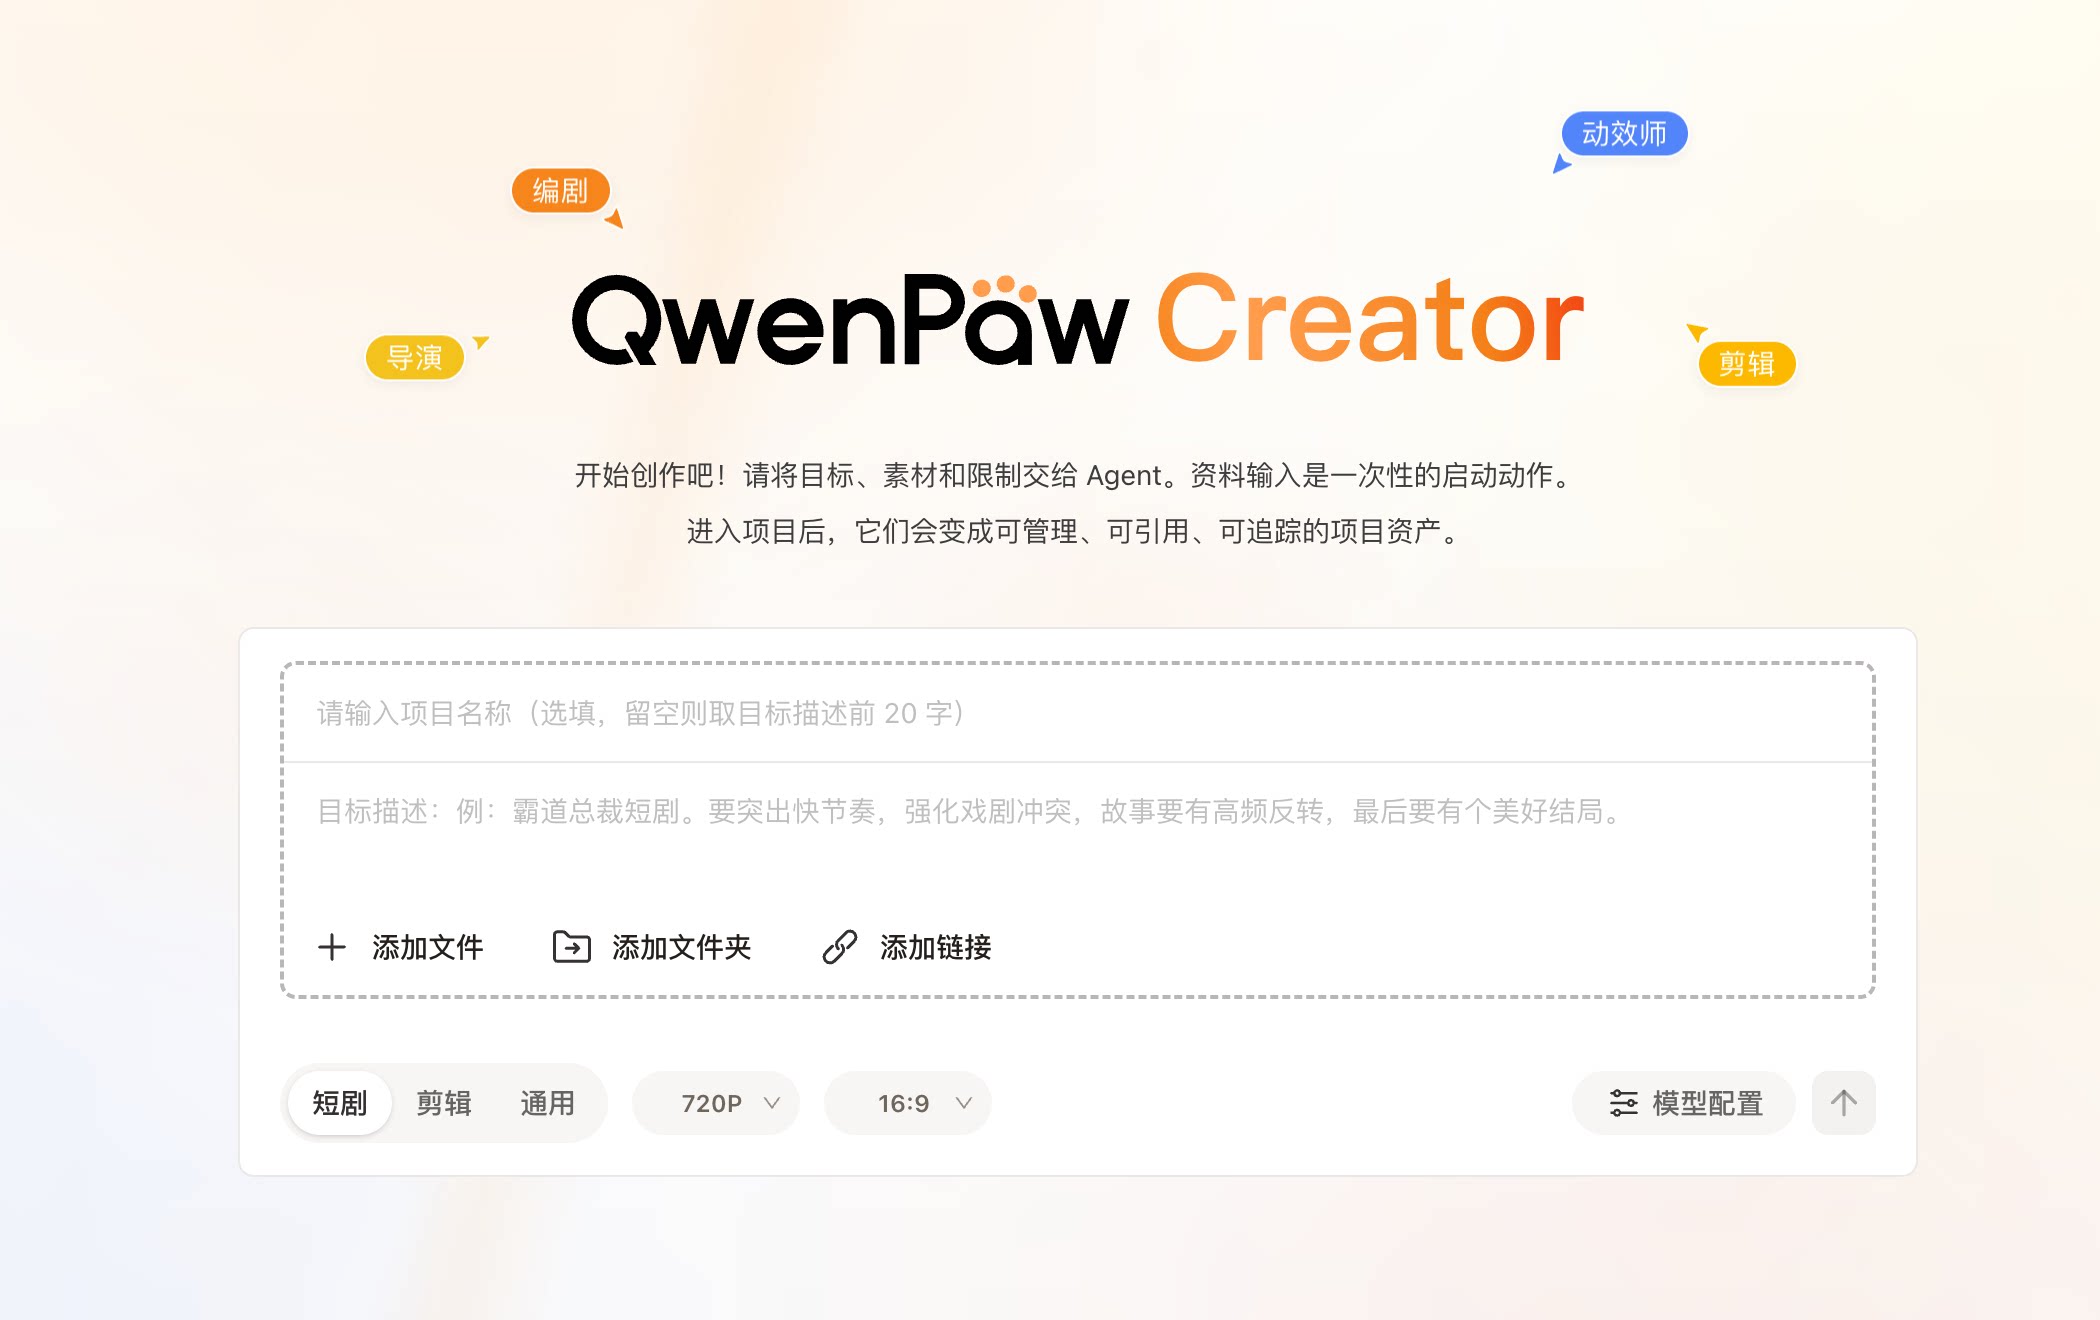
3. Hand the goal and sources to the Agent
- Describe the goal: for example, “Create a fast-paced short drama with strong conflict and a warm ending,” or “Turn these cat videos into a one-minute highlight reel”;
- Provide sources (optional): add files, folders, or links. Inside the project they become manageable, referenceable, and traceable assets;
- Choose the format: Short Drama / Editing / General, plus resolution and aspect ratio;
- Send the brief. The Agent starts planning and opens the workbench.
The workbench: selection becomes context, with manual control
Creator’s Agentic layer is not merely a chat panel beside the editor: the project content itself is addressable Agent context. Select a timeline point, drag a time range, click a clip / subtitle / motion / transition / asset, or select page text, then choose Add to conversation. The selection appears as AgentDock context; describe the intended change and the Agent works against that exact object.
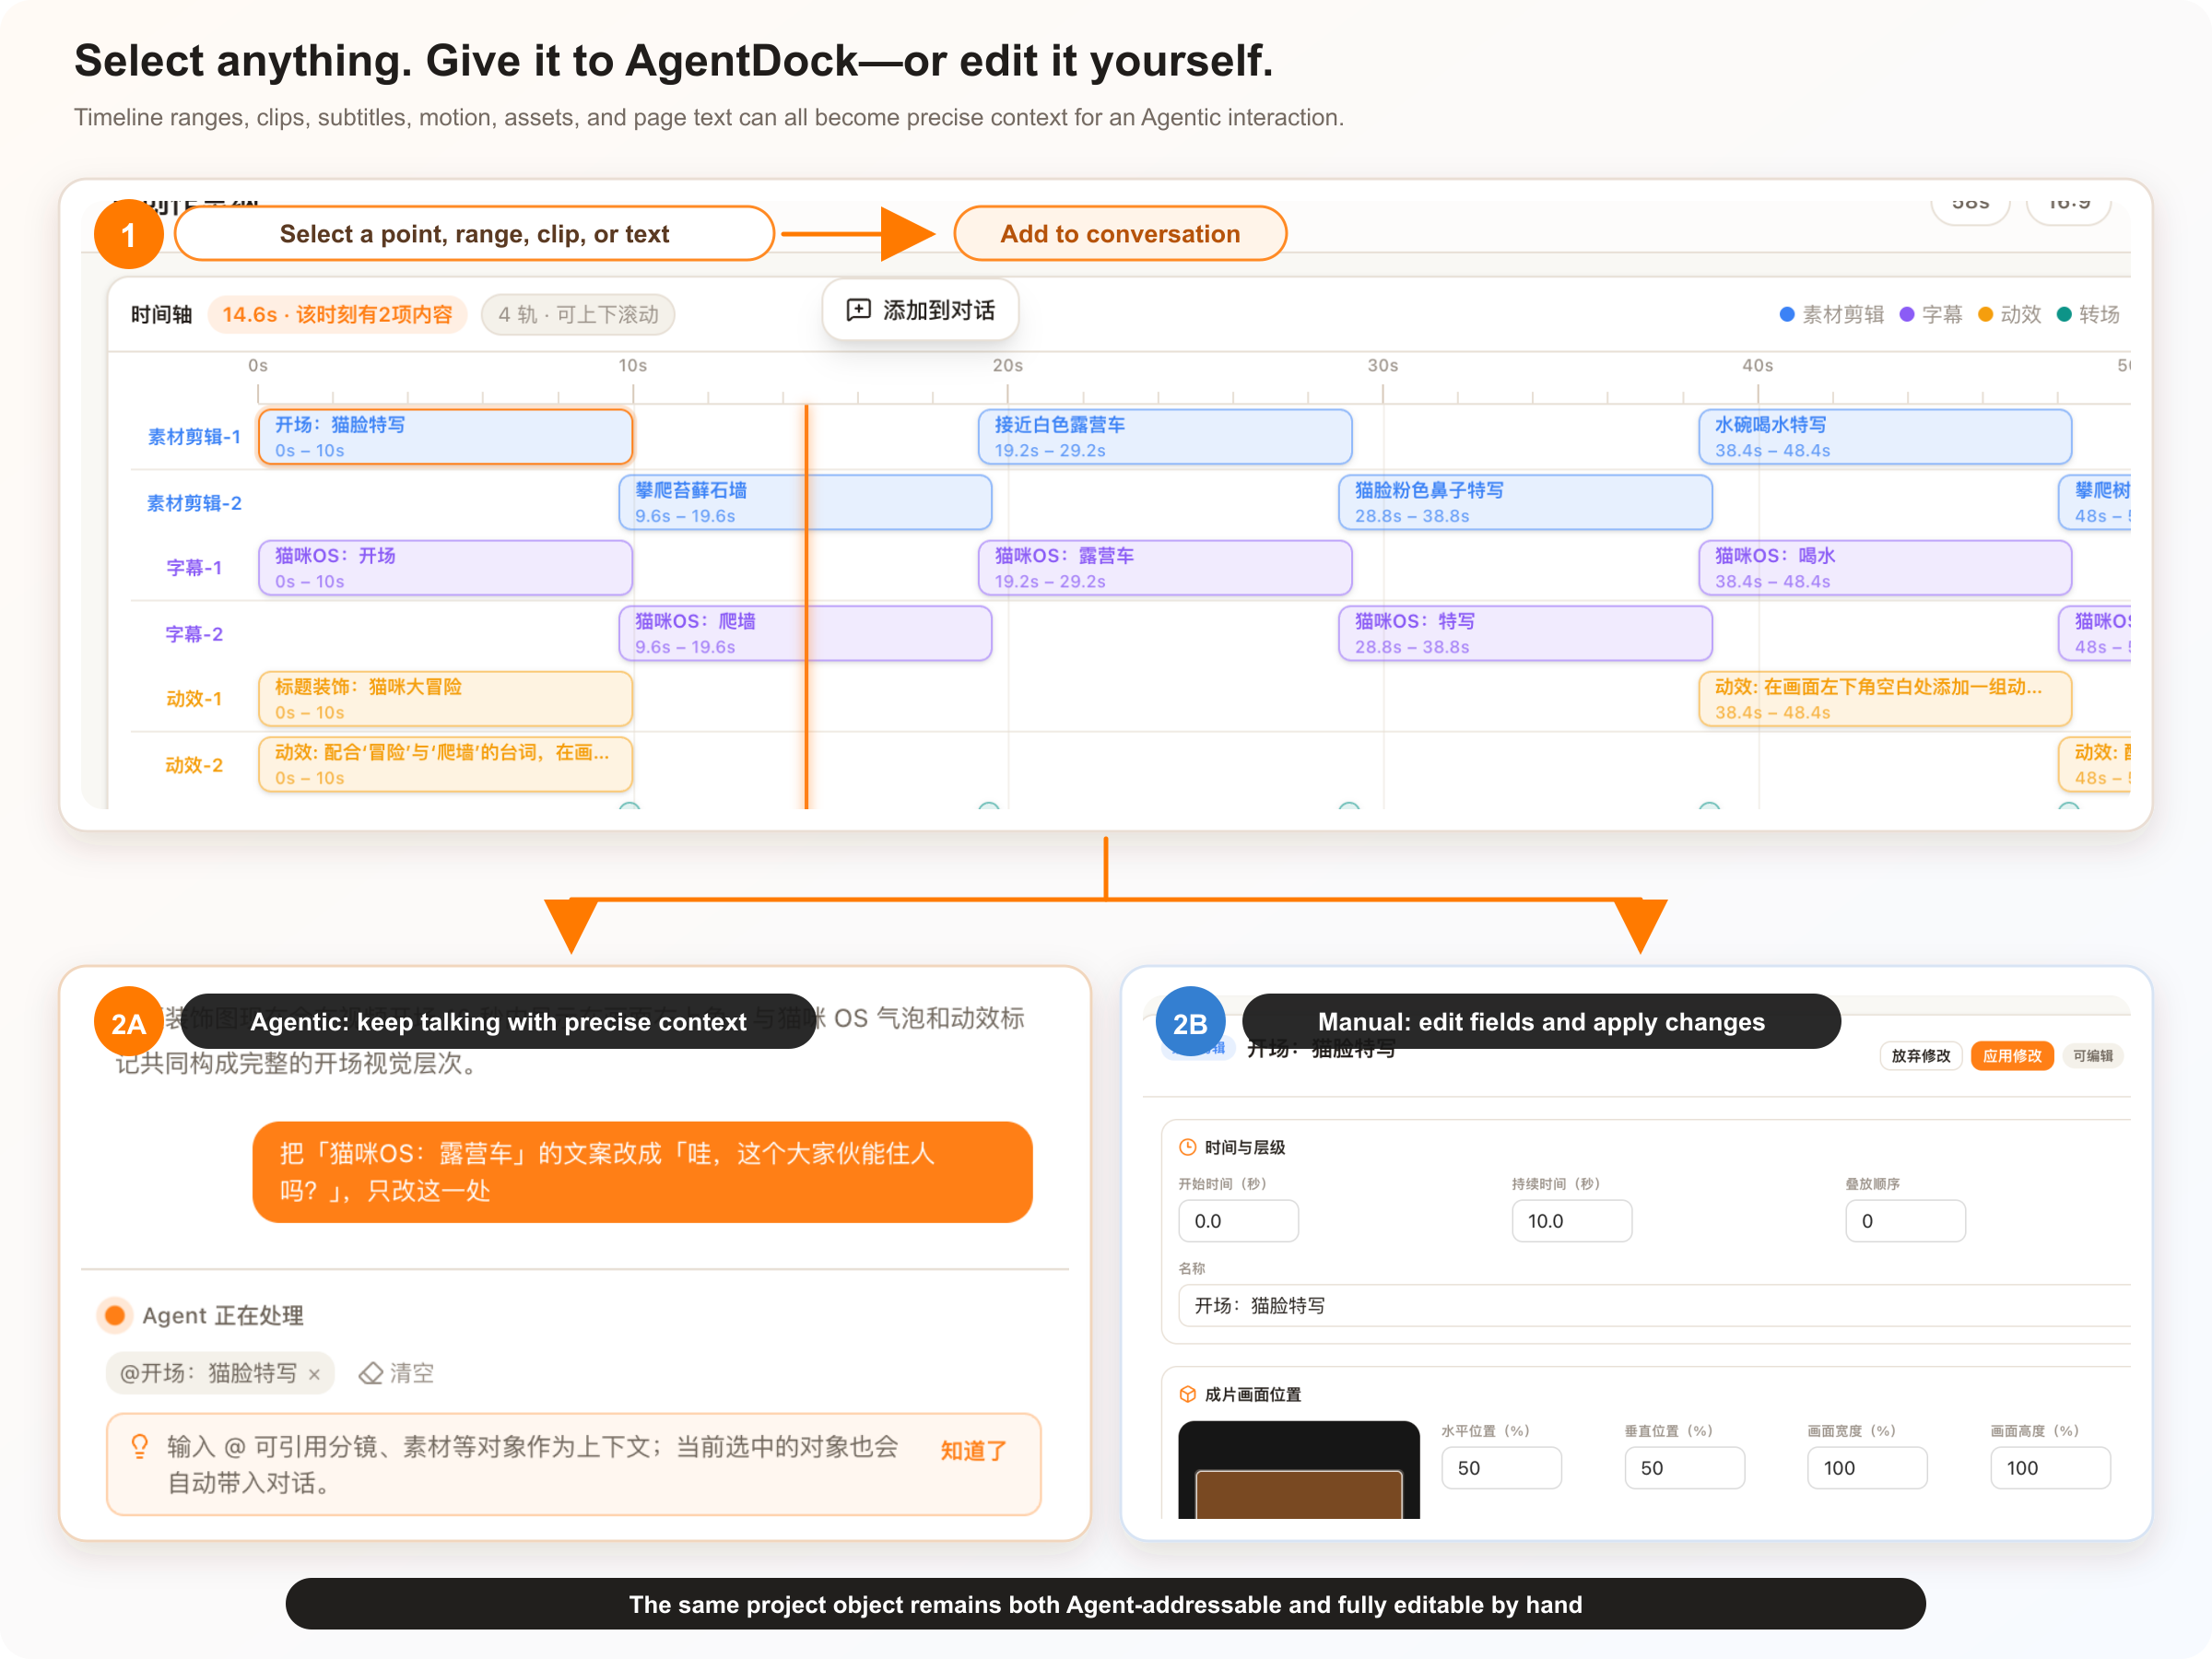
| What you select | How it becomes Agent context | What remains manually editable |
|---|---|---|
| A timeline point or dragged time range | Use the floating Add to conversation action to send the exact span to AgentDock | Continue adjusting clip bounds, order, track relationships, and rhythm |
| A clip, subtitle, motion, transition, asset, or artifact | The selection is associated automatically; use @ to reference it again |
Open details to edit timing, stacking, position, opacity, or copy |
| A section of page text | Select the text and choose Add to conversation | Edit the source field directly, or ask the Agent to change only that passage |
Timeline content, project elements, assets, and text are therefore not static results that an Agent can only “see”; they are referenceable, locatable, editable, and reviewable project objects. Use Asset Library at the top to browse source material and generated outputs. Video Preview / Download Film checks and exports the current plan.
Three practical Agent collaboration habits
- Reference with
@: attach a shot, source, or other object as context; the selected object is also carried into the conversation automatically; - Intervene at any time: ask for a targeted change such as “only rewrite the second caption” or a broader one such as “add a sunray motion treatment to the opening”;
- Stop when needed: interrupt an in-progress task immediately with the stop control.
Two typical creation paths
Short-drama generation: zero to film
- Script and shots: screenwriting / directing Specialists turn the goal into scenes, characters, action, and dialogue;
- Consistency assets: anchor images establish each character and scene;
- Storyboard and video: frames use those assets as references, then reference-to-video (r2v) models generate clips;
- Composition: ready clips enter the shared timeline and are composed into a complete film.
Footage editing: sources to film
- Understand sources: VLM analysis (plus ASR for speech) finds content and highlight moments;
- Build an edit plan: the Agent selects clips, arranges the timeline, and adds subtitles, motion, and transitions;
- Human + Agent refinement: adjust a segment directly or ask the Agent to do it;
- Preview and compose: confirm the plan and render the film.
Review: every Agent change has a clear decision
Generated media and Agent-authored text changes enter the decision tray. Content you edit manually applies directly and does not create another review item.
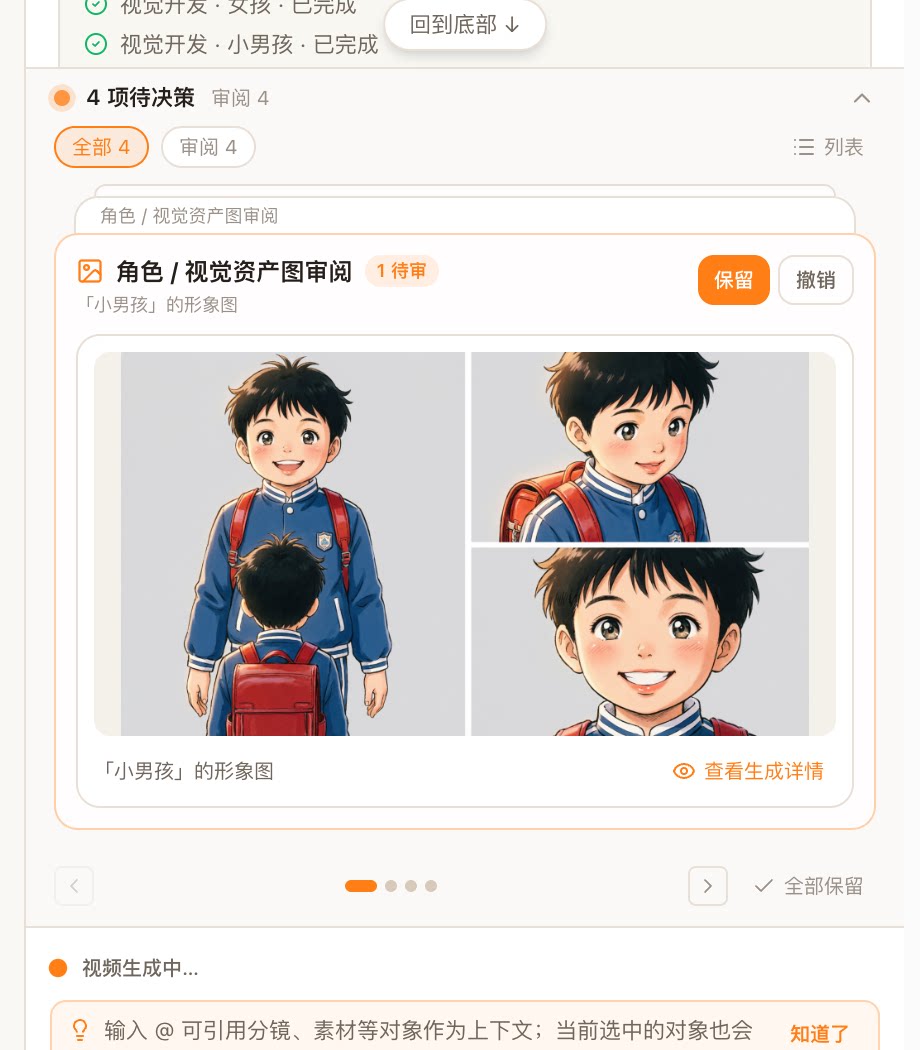
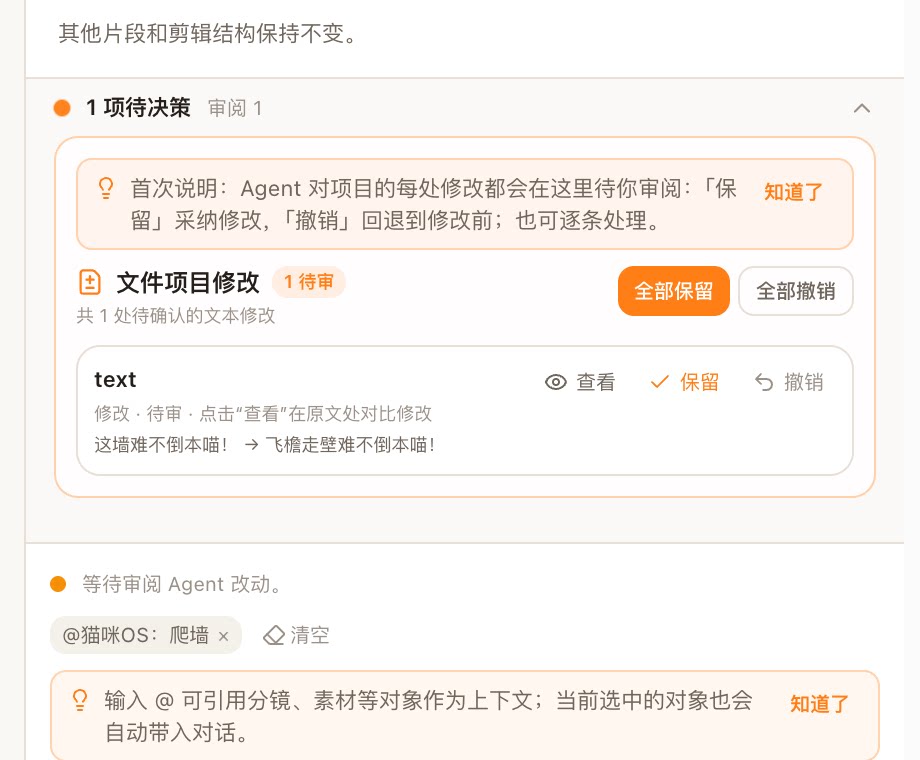
Review items jump as close as possible to their generation context: character image → asset detail, storyboard frame → shot detail, and text change → original location.
Production confirmation: see estimated cost before a paid call
Before a paid image or video generation call, the Agent presents a production confirmation card with the target, model, parameters, and a locally estimated cost. The billable task is submitted only after you click Continue; Cancel ends that production request.
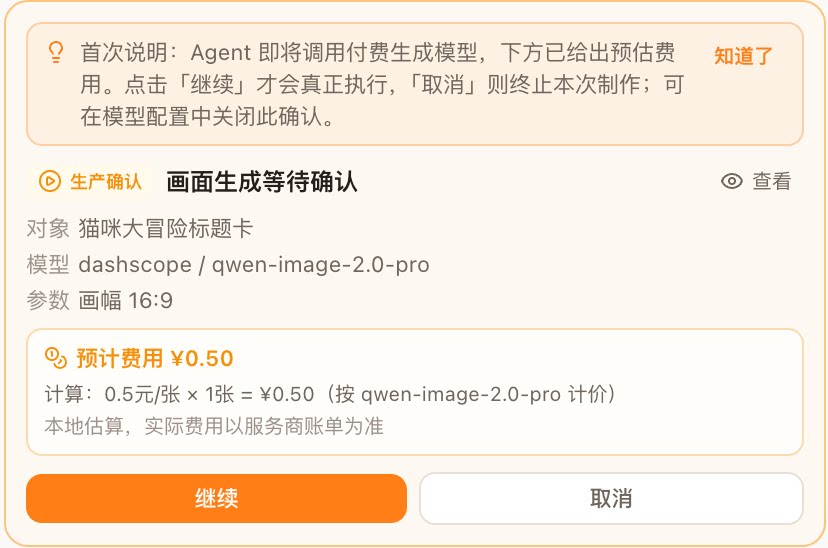
💰 The estimate is computed locally from published model pricing and is for reference only. Your provider’s bill is authoritative. This confirmation can be disabled in Model Configuration.
Preview, manage, and export
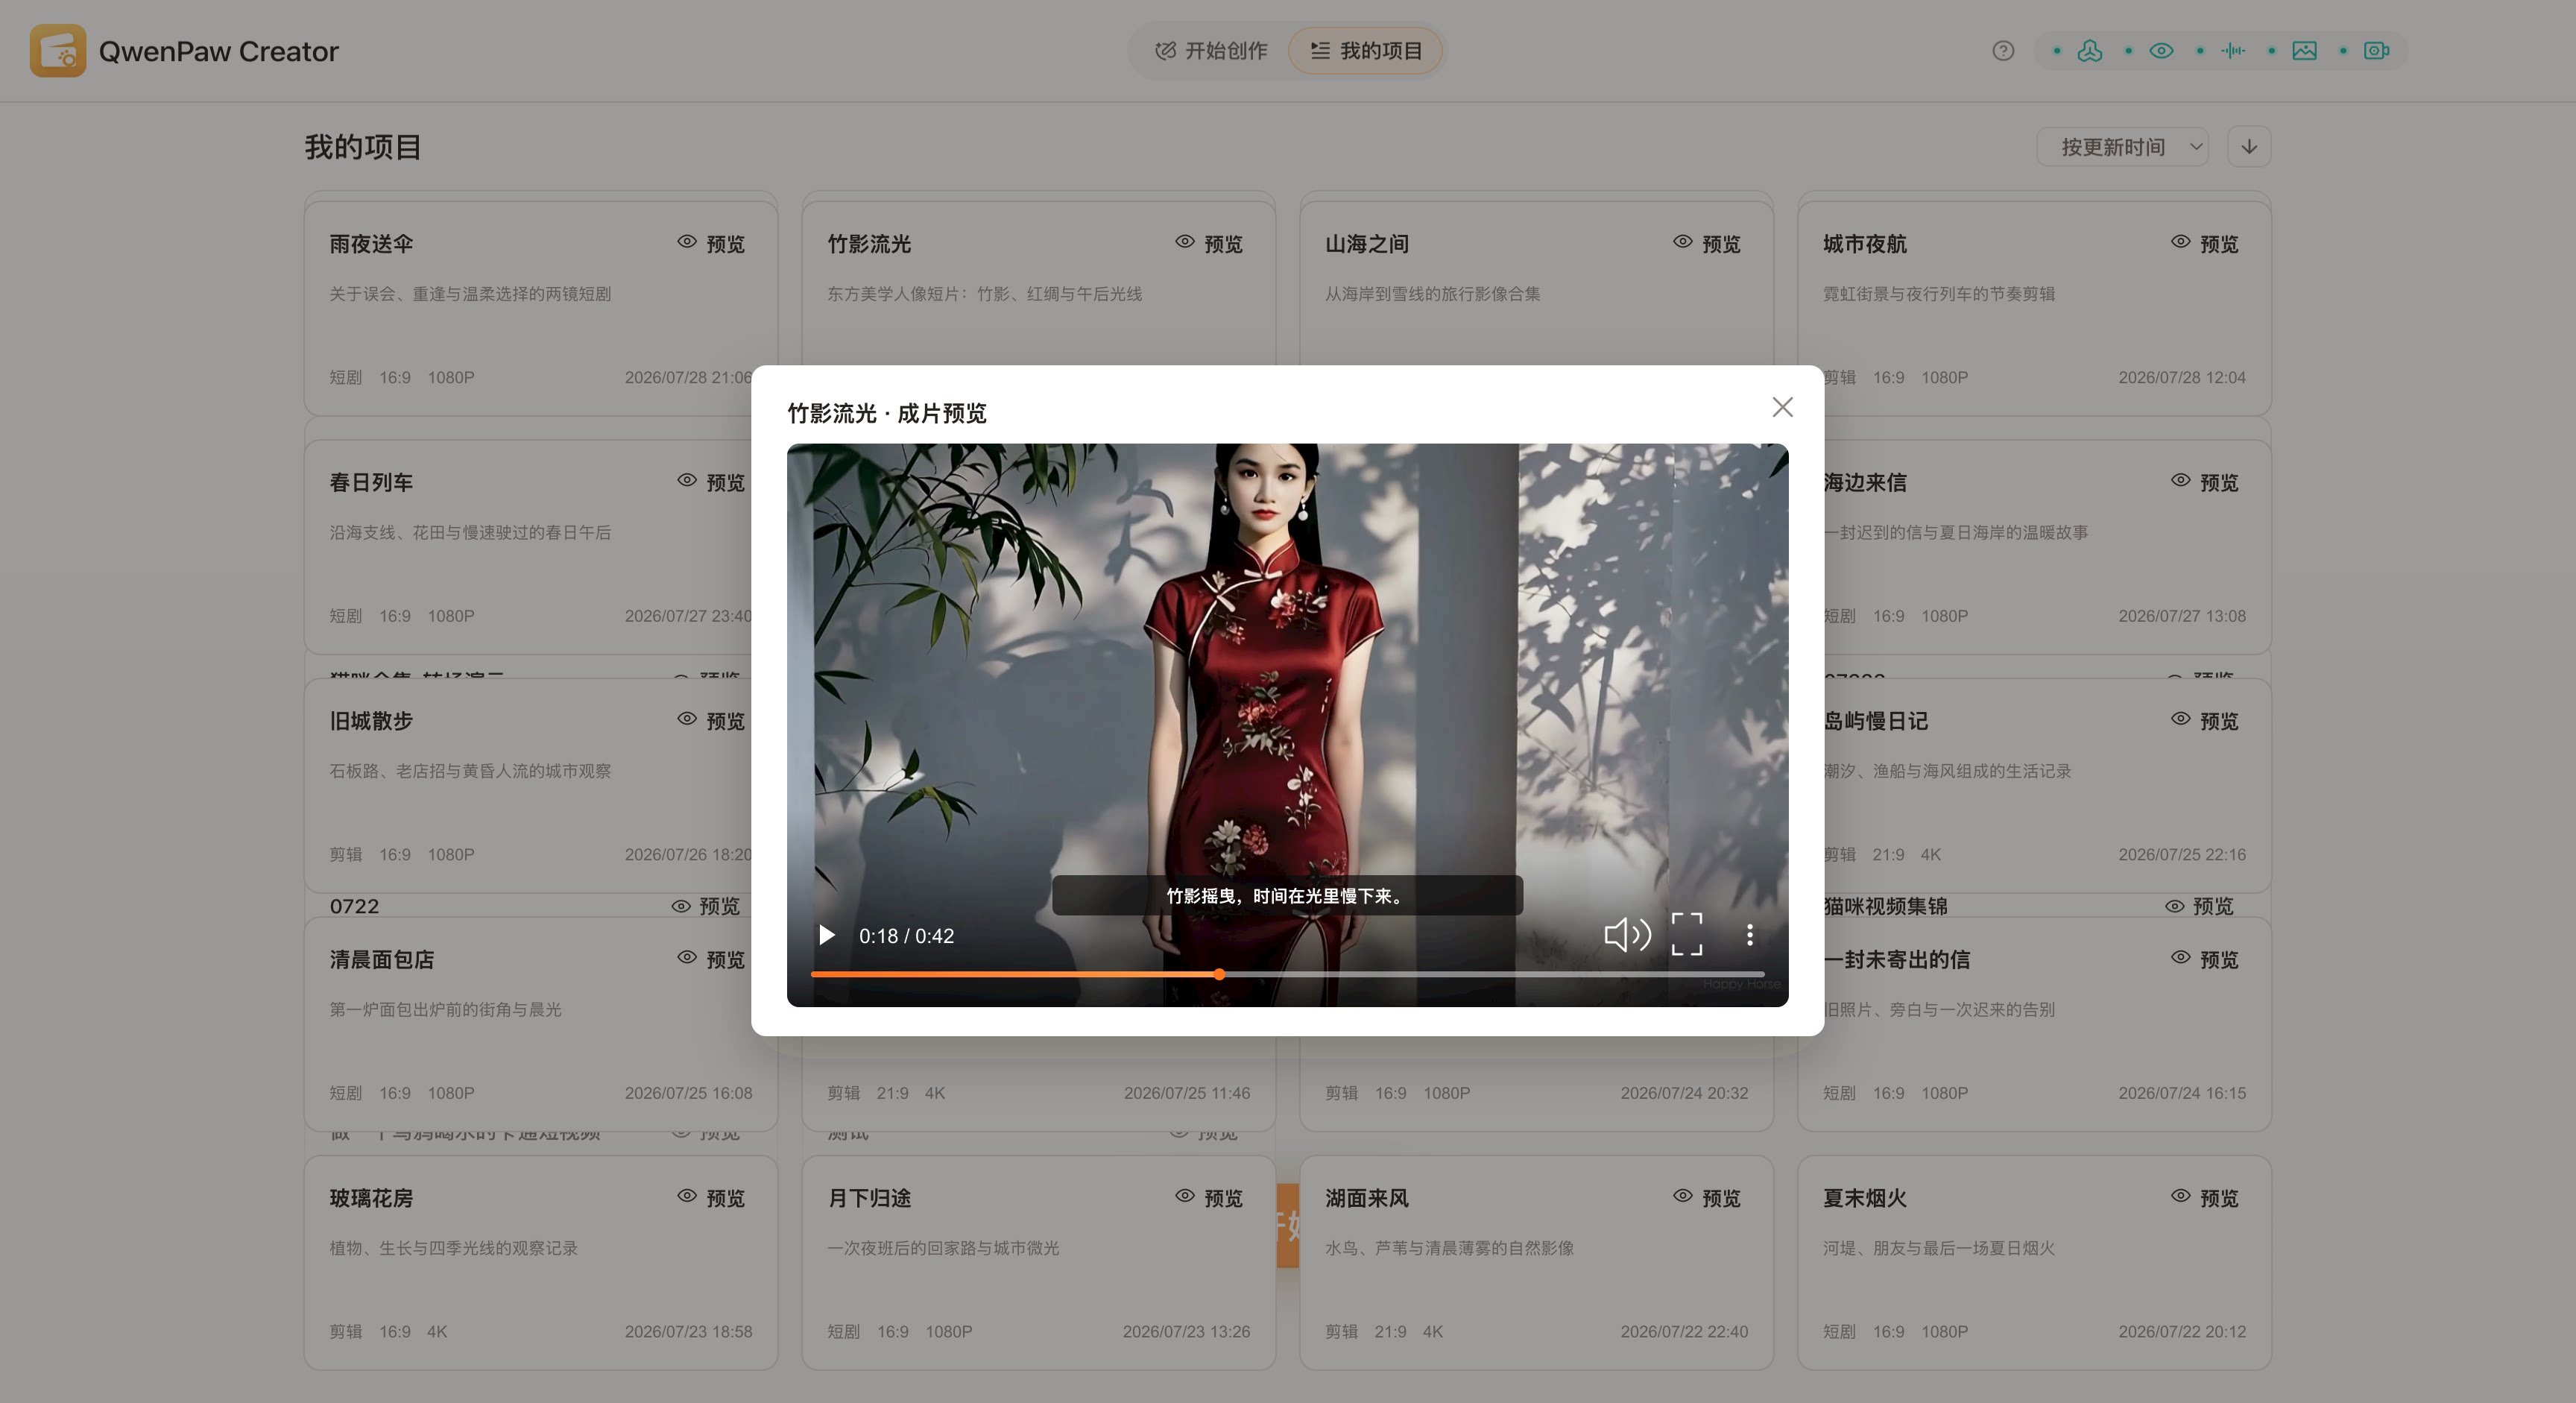
- Preview the film: use “Video Preview” in the workbench, or “Preview” on a card in My Projects;
- Download: use “Download Film” at the upper right of the workbench;
- Manage projects: My Projects shows creation type, aspect ratio, resolution, and update time, with sorting controls.
Appendix: installation and runtime
Open Apps in the QwenPaw console, find QwenPaw Creator, and select Install. After installation, open Creator directly from Apps.
Creator uses a few local tools without changing your system installation: ffmpeg handles media processing and composition (set CREATOR_FFMPEG_PATH, otherwise it falls back to system ffmpeg or imageio-ffmpeg); jq supports structured Agent edits to project files (CREATOR_JQ_PATH or PATH). If a dependency is missing, Creator starts in degraded mode; inspect GET /api/qwenpaw-creator/health for details.